Build SAP Overview Page using SAP HANA Cloud & SAP CAP service annotations in Visual (VS) Code
Build SAP Overview Page in Visual VS Code with this VS Dev Container
If you use this VS Dev Container you can follow all the steps without having to install any further program. This walkthrough only provides my additional quidance for this awesome 👍 tutorial from SaiNithesh Gajula.
Preparations
- Use only the mentioned VS Dev Container and no installations are necessary!
Project development
Step 3 : Select CAP Project and click on Next until Step 6
node ➜ /dr-cf-build-sap-overview-page/
$ npm install
2
Step 7: hana-cli createModule
node ➜ /dr-cf-build-sap-overview-page/
$ hana-cli createModule
2
After executing the command it looks like this
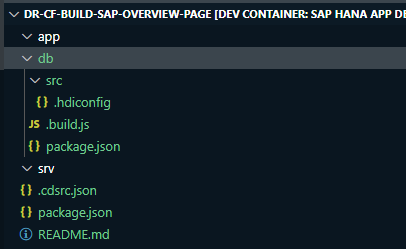
Step 8: Create the data model cds schema.cds under db layer.
node ➜ /dr-cf-build-sap-overview-page/db
$ create file schema.cds
2
Step 9: Create a CDS service capfesrv.cds in srv.
Step 10: Now create annotation file under srv layer named as ovpcapfeannotation.cds.
Step 11: Using cds watch we can run the server and can the observe the logs in the terminal according to the development.
node ➜ /dr-cf-build-sap-overview-page/db
$ cds watch
2

Step 12: Let’s us check the metadata based on the service and annotations
http://localhost:4005/service/cap/$metadata
Step 13: Add csv files under db/csv naming as namespace-entity.csv
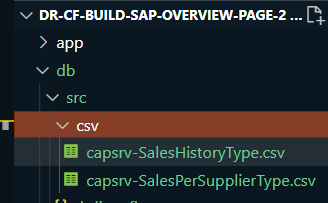
http://localhost:4005/service/cap/SalesHistory?$top=11
Step 14: Update the package.json with hana configurations & devDependencies.
Install v2-proxy-adapter
node ➜ /dr-cf-build-sap-overview-page/
$ npm i @sap/cds-odata-v2-adapter-proxy
2
Change the "deploy-format"
package.json
"deploy-format": "sql" --> "deploy-format": "hdbtable"
2
Step 15: To create V2 will add server.js odata v2 proxy using npm i @sap/cds-odata-v2-adapter-proxy
Add server.js
"use strict";

const cds = require("@sap/cds");
const proxy = require("@sap/cds-odata-v2-adapter-proxy");

cds.on("bootstrap", app => app.use(proxy()));

module.exports = cds.server;
2
3
4
5
6
7
8
Step 16: Add node version in the package.json.
    "engines": {
        "node": ">=14"
    },
2
3
Step 17: Now generate and mta file using cds add mta.
node ➜ /dr-cf-build-sap-overview-page/
$ cds add mta
2
Step 18: Execute cds build
node ➜ /dr-cf-build-sap-overview-page/
$ cds build
2

http://localhost:4005/service/cap/SalesHistory?$top=11
Step 19: Now let us login to SAP Cloud Foundry.
cf login -a https://api.cf.eu10.hana.ondemand.com -u email@ -p xxx --skip-ssl-validation
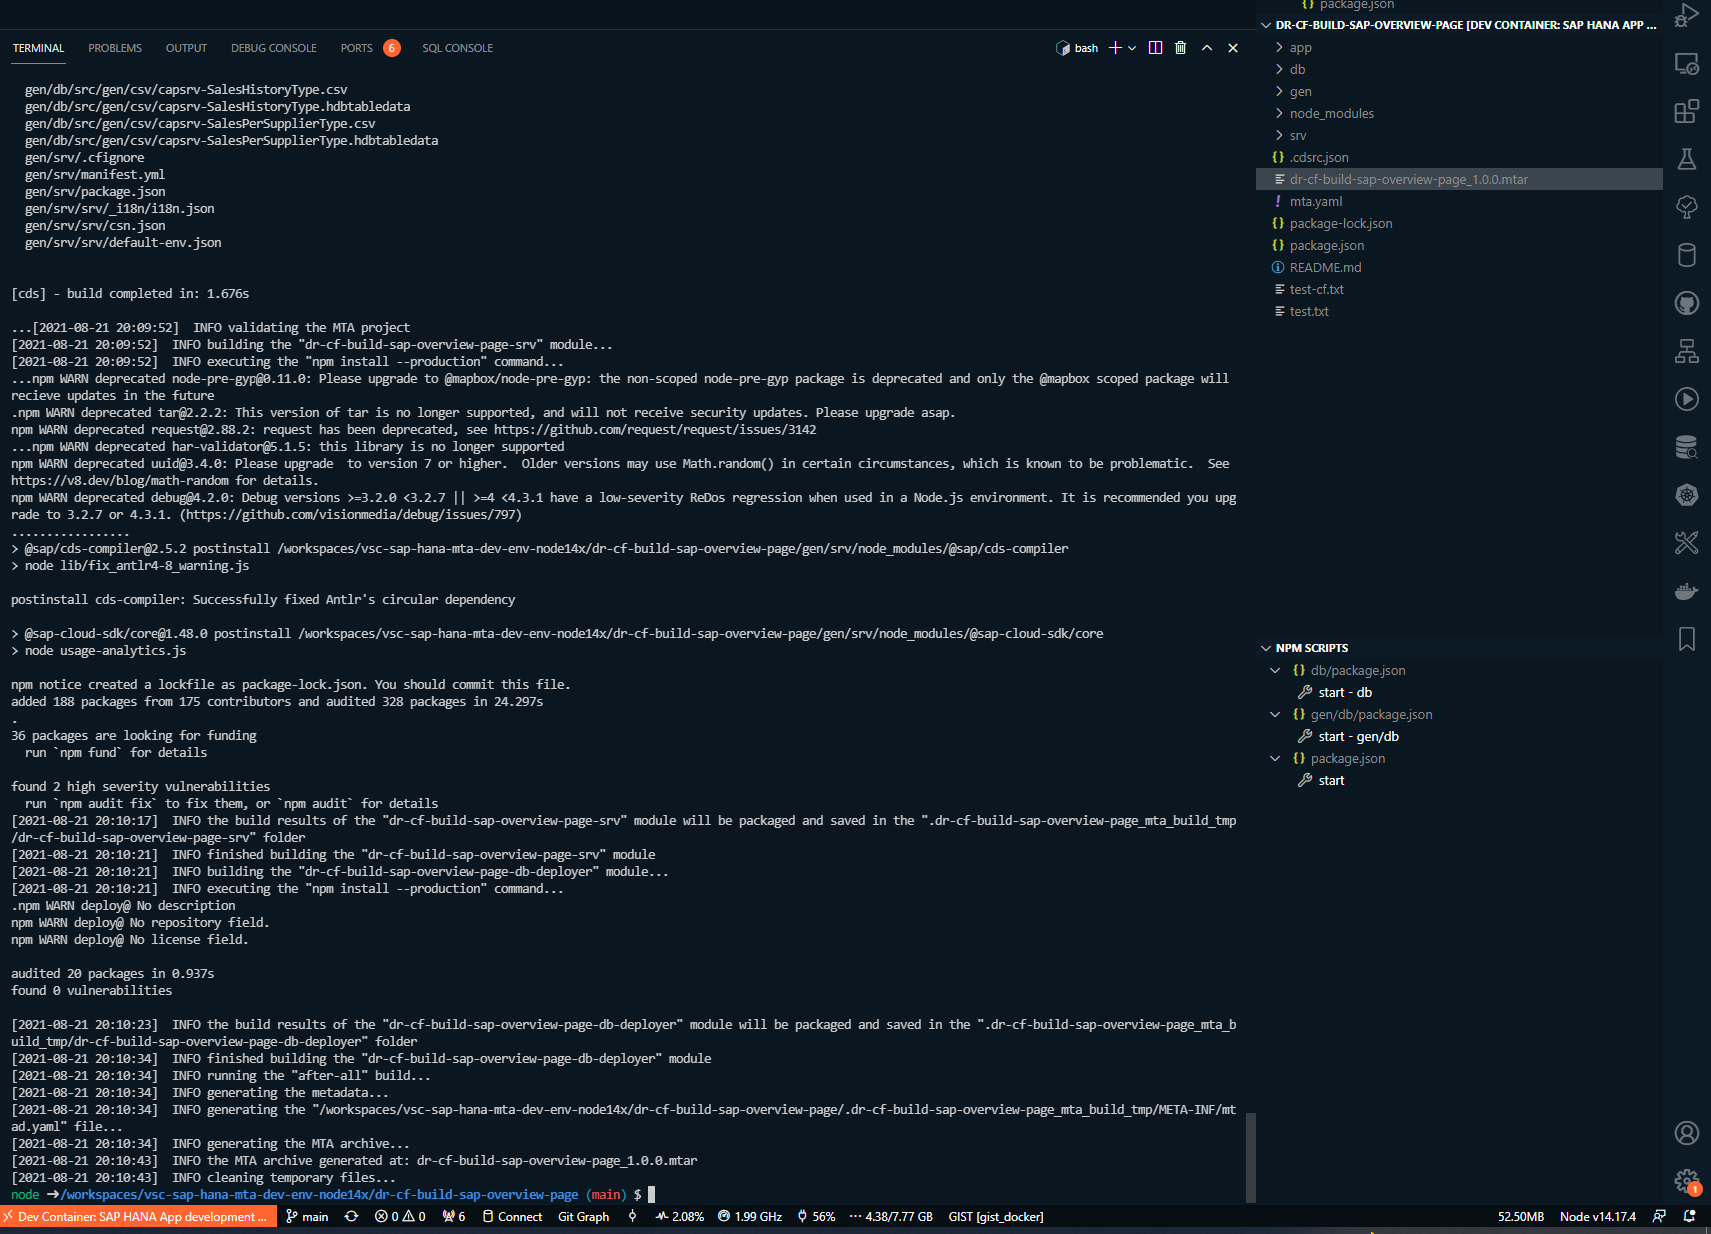
Step 20: Build the mtar file using mbt build -t ./
mbt build -t ./
Check for your SAP HANA DB it's up and running! In my case the HANA DB was more times down and it took me a lot of time to start it again. 😒

Step 21: Deploy the app to BTP
cf deploy dr-cf-build-sap-overview-page_1.0.0.mtar
After Deployment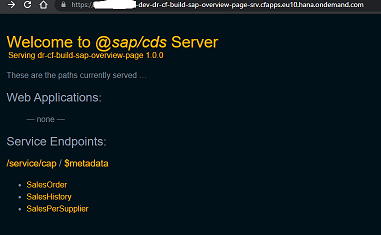
Step 22: Now we can see the cap service is available to use both in v4 & v2 version
Check for the different OData versions in BTP
metadata
https://xxxxx-dev-dr-cf-build-sap-overview-page-srv.cfapps.eu10.hana.ondemand.com/v2/service/cap/$metadata

https://xxxxx-dev-dr-cf-build-sap-overview-page-srv.cfapps.eu10.hana.ondemand.com/service/cap/$metadata
2
3
4
data
https://xxxxx-dev-dr-cf-build-sap-overview-page-srv.cfapps.eu10.hana.ondemand.com/v2/service/cap/SalesHistory?$top=11

https://xxxxx-dev-dr-cf-build-sap-overview-page-srv.cfapps.eu10.hana.ondemand.com/v2/service/cap/SalesHistory?$top=11
--> its working, can see the data! :)
2
3
4
5
Step 23: Now let us create SAP Fiori Elements. Press F1 and start typing and select >Fiori: Open Application Generator. Choose Overview Page and click Next.
Step 24: Choose Connect to an OData Service under Data Source & Service Selection
Step 25: Provide the oData V2 CAP service and click Next.
Step 26: Select the SalesOrder for Filter entity and click on Next.
Step 27: Now let’s run the application, right click on the project, and choose Preview Application.
npm run start
Step 28: You can see empty screen with filters.

Step 29: Lets add cards now in manifest.json and change enableLiveFilter to false. So that Go action will get enabled.
web/webapp/manifest.json
"enableLiveFilter": false,
Step 30: Reload the app, we can the charts get rendered based on the annotations which we created earlier
Added the two cards in manifest.json file web/webapp/manifest.json
  "sap.ovp": {
    "globalFilterModel": "mainService",
    "globalFilterEntityType": "SalesOrder",
    "containerLayout": "resizable",
    "enableLiveFilter": false,
    "considerAnalyticalParameters": false,
    "cards": {
      "donutCard": {
        "model": "mainService",
        "template": "sap.ovp.cards.charts.analytical",
        "settings": {
          "title": "Donut Chart",
          "entitySet": "SalesPerSupplier",
          "chartAnnotationPath": "com.sap.vocabularies.UI.v1.Chart#donut",
          "presentationAnnotationPath": "com.sap.vocabularies.UI.v1.PresentationVariant",
          "dataPointAnnotationPath": "com.sap.vocabularies.UI.v1.DataPoint#GrossAmountInCompanyCurrency",
          "idenfiticationAnnotationPath": "com.sap.vocabularies.UI.v1.Identification",
          "chartProperties": {
            "plotArea": {
              "dataLabel": {
                "type": "percentage"
              }
            }
          }
        }
      },
      "lineCard": {
        "model": "mainService",
        "template": "sap.ovp.cards.charts.analytical",
        "settings": {
          "title": "Line Chart",
          "entitySet": "SalesHistory",
          "chartAnnotationPath": "com.sap.vocabularies.UI.v1.Chart#Line",
          "presentationAnnotationPath": "com.sap.vocabularies.UI.v1.PresentationVariant",
          "dataPointAnnotationPath": "com.sap.vocabularies.UI.v1.DataPoint#GrossAmountInCompanyCurrency",
          "idenfiticationAnnotationPath": "com.sap.vocabularies.UI.v1.Identification"
        }
      }
    }
  }
2
3
4
5
6
7
8
9
10
11
12
13
14
15
16
17
18
19
20
21
22
23
24
25
26
27
28
29
30
31
32
33
34
35
36
37
38
39
40
For the moment I'm not able to see the two charts. 😞 If you know why, please let me know!
Additional note for connecting hdi container
You'll need the default-env.json file (credentials for connecting the hdi container).
Get the default-env.json file (credentials) by running hana-cli serviceKey
node ➜ /dr-cf-build-sap-overview-page (main)
$ hana-cli serviceKey
Input: CF/XS Service Instance Name:  dr-cf-build-sap-overview-page-db
Input: CF/XS Service Key Name:  dr-cf-build-sap-overview-page-db-key
Service Key dr-cf-build-sap-overview-page-db-key created

Output:
The default-env.json file was saved with connection details!
2
3
4
5
6
7
8
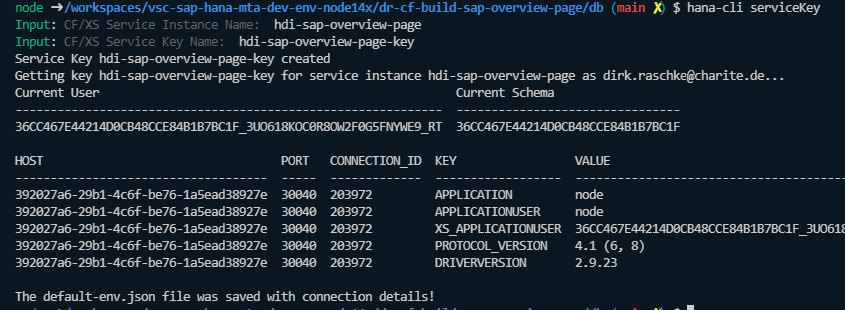
Put the default-env.json file in the right modul or on root. 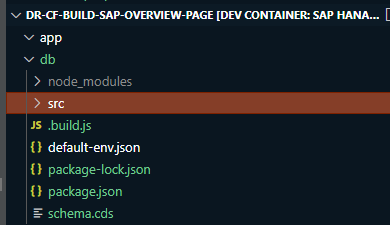
Check the connection, by running hana-cli status
node ➜ /dr-cf-build-sap-overview-page/db (main ✗) $ hana-cli status
Using Connection Configuration loaded via ../default-env.json
2
Now you are able to look for any db object
$ hana-cli tables 01194FD1C37145A9801EF50C4EAECFE4
Using Connection Configuration loaded via default-env.json

SCHEMA_NAME                       TABLE_NAME                   TABLE_OID  COMMENTS
--------------------------------  ---------------------------  ---------  --------
01194FD1C37145A9801EF50C4EAECFE4  CAPSRV_SALESHISTORYTYPE      161480     null
01194FD1C37145A9801EF50C4EAECFE4  CAPSRV_SALESORDERTYPE        161497     null
01194FD1C37145A9801EF50C4EAECFE4  CAPSRV_SALESPERSUPPLIERTYPE  161511     null
2
3
4
5
6
7
8