Deploy a simple Node.js app to XSA platform by leverage Visual VS Code Dev Container
I suspect that the SAP WebIDE will no longer supported with new features for on-premise sytems, so we've to set up our own development environment and know how to handle all the development steps locally in our own IDE. In this exercise I will follow the deployment steps for a simple Node.js app, which that are described in this SAP-Guide - Deploy a Node.js Hello-World Application using the XS CLI. I love to leverage VS Code and that's why I'm going to show how to do this with the VS Dev Containers.
You can follow all my steps with this VS Dev Container for Node.js 12x
Preparations
- Use VS Dev Container Nodejs12x and no additional installations are necessary for this exercise!
- You need the XS Client for XSA deployment.
- Clone this simple SAP XSA repo in a directory of your choice
- We will develop with this simple SAP app myxsaapp2
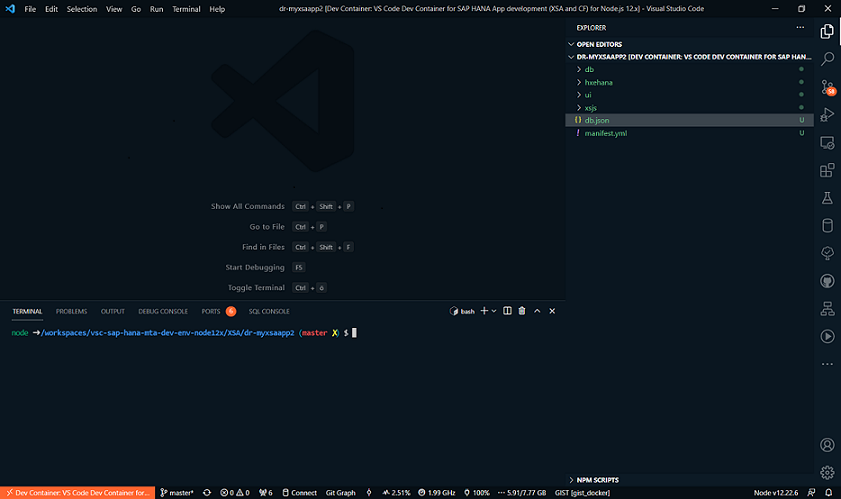
Set up for VS Code Dev Container (as you can see, we are inside of a VS Dev Container)
Kick off development
Step 1: Login to your space
node ➜ .../XSA/myxsaapp2/ (master ✗)
$ xs login -a https:// -u user -p psw -s space --skip-ssl-validation
2
Step 2: Create a uaa service
node ➜ .../XSA/myxsaapp2/ (master ✗)
$ xs create-service xsuaa space my-uaa
2
Step 3: Create hdi service
node ➜ .../XSA/myxsaapp2/ (master ✗)
$ xs create-service hana hdi-shared my-hdi-container
2
Adapt the application's deployment dependencies defined in the manifest.yml file to suit your SAP HANA XS advanced environment
Step 4: Change your destination in manifest.yml if necessary
hostname-based routing
[
  {"name":"xsjs-backend", "url":"myxsaapp2.host.acme.com, "forwardAuthToken":true}
]
2
3
port-based routing
[
  {"name":"xsjs", "url":"https://host.acme.com:64012", "forwardAuthToken": true}
]
2
3
Set up for db app
Step 5: Install node packages
node ➜ .../XSA/myxsaapp2/db
$ npm i
2
Step 6: Push db from root to XSA (it requires the manifest file)
You need to be /root for pushing db (Not sure, but I think so.)
node ➜ /workspaces/XSA/myxsaapp2/ (master ✗)
$ xs push db

Using manifest file "manifest.yml"
Updating app "db" in org "orgname" / space "DEV" as YourUser...
WARNING: Found route binding(s) for app "db", but no-route option is set!
Uploading "db" ...
2
3
4
5
6
7
Step 7: Check that your db-app is running
$ xs app db

Showing status and information about "db"...
  name:                               db
  requested state:                    STARTED
  instances:                          1
  memory:                             256 MB
2
3
4
5
6
7
If db is not running, check the logs and fix it
node ➜ .../XSA/myxsaapp2/db (master ✗)
$ xs logs db --last 100 > db.txt
2
Step 8: Deploy db to XSA
node ➜ .../XSA/myxsaapp2/db
npm run start
deploy@ start /workspaces/XSA/myxsaapp2/db
node node_modules/@sap/hdi-deploy/deploy.js
Unlocking the container "E8FA0D9DA2464FCF8BEA3673ACD70163"... ok (0s 32ms)
Deployment to container E8FA0D9DA2464FCF8BEA3673ACD70163 done [Deployment ID: none].
Deployment ended at 2021-09-06 17:59:30
(81s 62ms)
Application can be stopped.
2
3
4
5
6
7
8
9
Close this terminal STRG + C
If you want to develop locally and establish a connection with the HANA DB, you have to include the default-env.json files in your app modules
Step 9: Fetch the default-env.json (credentials for connecting hana system via hana-cli)
node ➜ .../XSA/myxsaapp2/db (master ✗)
$ hana-cli serviceKey --cf false
Input: CF/$ xs Service Instance Name:  my-hdi-container
Input: CF/$ xs Service Key Name:  my-hdi-container-key
Service Key my-hdi-container-key created
2
3
4
5
Step 10: Change encrypt to false, if you have too
db/default-env.json
"encrypt": false,
2
Step 11: Copy db/default-env.json Copy this file to the xsja and ui app
Now you are able to leverage hana-cli for developing hana application if you want. Try looking for the dummy table "MyTable" or go to the hana-cli repo and look for other nice hana-cli commands.
Step 12: Sample for getting your tables (is only one table)
node ➜ .../XSA/myxsaapp2/db (master ✗)
$ hana-cli tables --cf false
Using Connection Configuration loaded via default-env.json

SCHEMA_NAME                       TABLE_NAME                    TABLE_OID  COMMENTS
E8FA0D9DA2464FCF8BEA3673ACD70163  myxsaapp2::MyContext.MyTable  51303908   null
2
3
4
5
6
Set up for xsjs app
Step 13: Change the node.js version to 12.x
node ➜ .../XSA/myxsaapp2/xsjs (master ✗)
  "engines": {
    "node": ">=12.x"
  },
2
3
4
Step 14: Install node packages
node ➜ .../XSA/myxsaapp2/xsjs (master ✗)
$ npm i
2
Step 15: Push xsjs from root to XSA (it requires the manifest file)
You need to be /root for pushing xsjs
node ➜ .../XSA/myxsaapp2/ (master ✗)
$ xs push xsjs
Using manifest file "manifest.yml"

Creating app "xsjs" in org "orgname" / space "DEV" as YourUser...
Creating HTTP route "xsjs.host.acme.com" in org "orgname" / space "DEV" as YourUser...
Binding route "https://xsjs.host.acme.com" to app "xsjs"...

Uploading "xsjs" ...
 Checking which files to upload from /workspaces/XSA/myxsaapp2/xsjs ...
 -> "xsjs" consists of 5072 files.
 Uploading 1 new or modified files (13.5 KB) ...
 Uploading "xsjs" finished in 1.35 s.

Staging app "xsjs"...
   OUT   Node.
 1 of 1 instances running
2
3
4
5
6
7
8
9
10
11
12
13
14
15
16
17
Step 16: Check for running xsjs app
node ➜ .../XSA/myxsaapp2/xsjs (master ✗)
$ xs a
2
Step 17: Fetch the environment VCAP_SERVICES from xsjs
node ➜ .../XSA/myxsaapp2/xsjs (master ✗)
xs env xsjs > xsjs.json
2
Step 18: Copy the env VCAP_SERVICES into your default-env.json file xsjs/default-env.json
Step 19: Include this code xsenv.loadEnv in your server.js
server.js
node ➜ .../XSA/myxsaapp2/xsjs (master ✗)
var port  = process.env.PORT || 3000;
xsenv.loadEnv();
2
3
Step 20: Start server
node ➜ .../XSA/myxsaapp2/xsjs (master ✗)
npm run start
output:
Server listening on port 3000
2
3
4
Set up for ui app
Step 21: Install node packages
node ➜ .../XSA/myxsaapp2/ui (master ✗)
$ npm i
2
Step 21.1: Fetch the ui-env (destination)
node ➜ .../XSA/myxsaapp2/ui (master ✗)
$ xs env web > web.json
2
Step 21.2: Copy the destination to default-env.json
Set the right port
"NODE_TLS_REJECT_UNAUTHORIZED": 0,
{"name":"xsjs-backend", "url":"http://localhost:3000", "forwardAuthToken":true},
2
default-env.json
{
  "VCAP_SERVICES" : {
    "xsuaa" : [ {
    "name" : "my-uaa",
    "label" : "xsuaa",
    "tags" : [ "xsuaa" ],
    "plan" : "space",
    "credentials" : {
    "tenantmode" : "dedicated",
    "clientid" : "sb-na-870dcb4d-fe8a-44b2-8ebf-861e0787db78!i5",
    "verificationkey" : "",
    "xsappname" : "na-870dcb4d-fe8a-44b2-8ebf-861e0787db78!i5",
    "identityzone" : "uaa",
    "identityzoneid" : "uaa",
    "clientsecret" : "",
    "url" : "https://uaa-server.host.acme.com:64012/uaa-security"
    }
    } ]
    },
  "NODE_TLS_REJECT_UNAUTHORIZED": 0,
  "destinations": "[{\"name\":\"xsjs-backend\", \"url\":\"http://localhost:3000\", \"forwardAuthToken\":true}]",
  "XS_APP_LOG_LEVEL": "error"
}
2
3
4
5
6
7
8
9
10
11
12
13
14
15
16
17
18
19
20
21
22
23
Step 22: Start ui
node ➜ .../XSA/myxsaapp2/ui (master ✗)
$ npm run start

web-approuter@ start /workspaces/XSA/myxsaapp2/ui
node node_modules/@sap/approuter/approuter.js

Application router is listening on port: 5000#
2
3
4
5
6
7
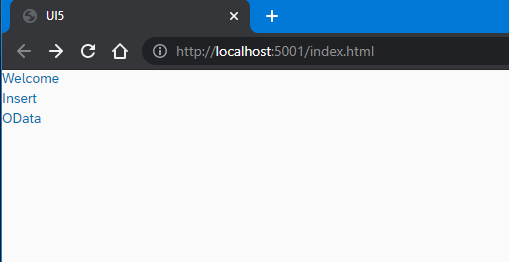
Voila, now you can develop UI apps locally using VS Code and are not dependent on SAP WebIDE for SAP HANA app development